Welcome back to our exciting blog series on building a Flutter Task Manager app with the help of ChatGPT! In this blog, we will focus on the first crucial step of our app development: designing the Login Screen.
Our goal is to develop a Task Manager app that empowers users to manage their tasks efficiently. Throughout this series, we aim to demonstrate how ChatGPT can guide us in building a feature-rich and user-friendly app. As we embark on this journey, it is essential to have a basic understanding of Flutter. If you are new to Flutter, fret not! We recommend visiting the official Flutter website to set up your development environment and get started.
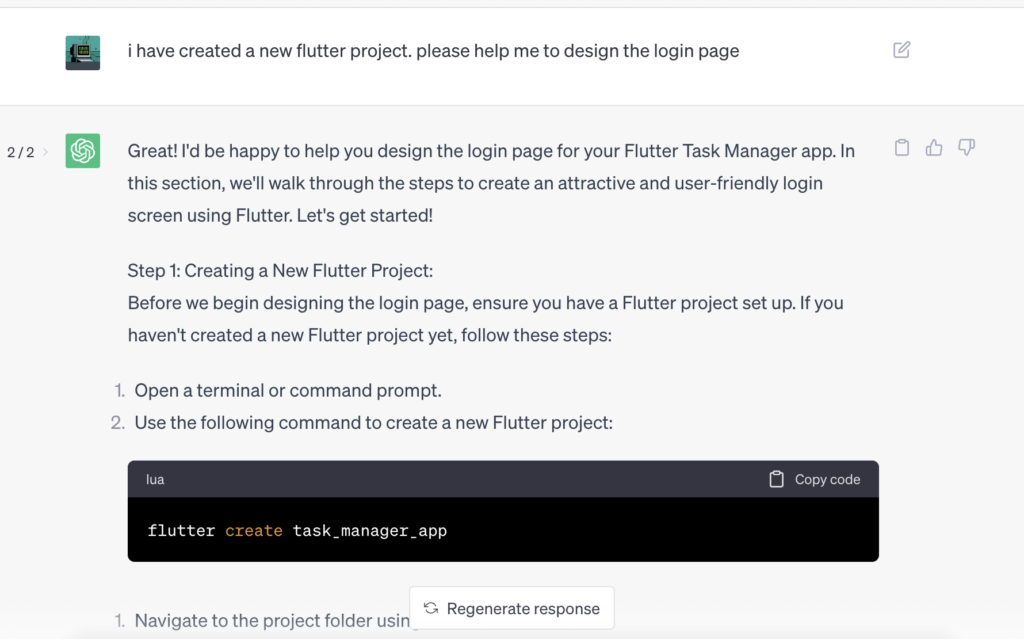
If you’re a beginner and uncertain about designing a Flutter page, ChatGPT has got you covered! With ChatGPT’s assistance, you can swiftly generate the entire code for your desired page. In a matter of seconds, ChatGPT can provide you with a login screen code featuring an email and password text field, along with a submit button. It’s truly amazing how ChatGPT empowers you to build your Flutter app even without prior design knowledge. You can easily copy the generated code and validate its functionality. The possibilities are exciting, and ChatGPT’s capabilities are indeed remarkable!


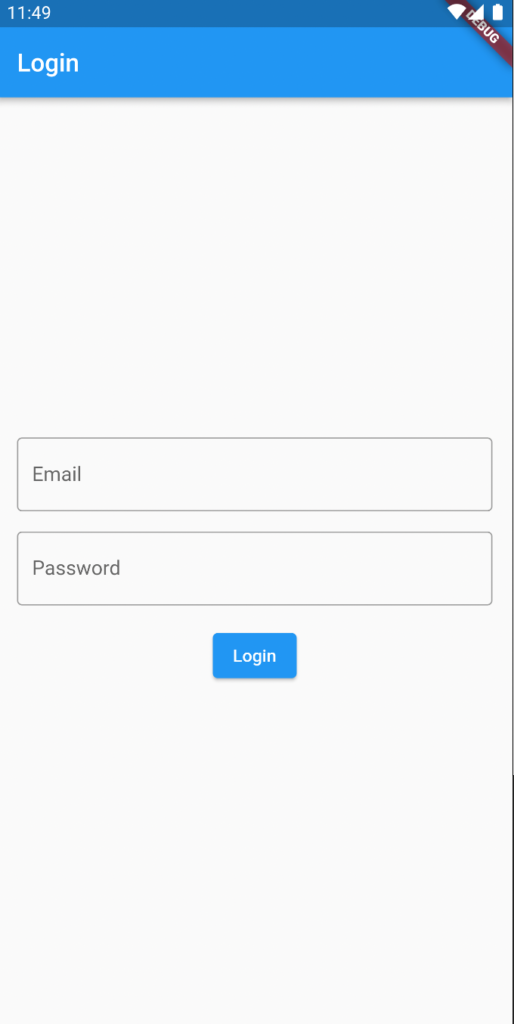
Lets copy the generated code and run the app
import 'package:flutter/material.dart';

class LoginScreen extends StatefulWidget {
  @override
  _LoginScreenState createState() => _LoginScreenState();
}

class _LoginScreenState extends State<LoginScreen> {
  final TextEditingController _emailController = TextEditingController();
  final TextEditingController _passwordController = TextEditingController();

  void _handleLogin() {
    // Implement login functionality here
    String email = _emailController.text;
    String password = _passwordController.text;

    // Add logic to validate the user's input
    // For this example, we assume the login is successful
    print('Logged in with email: $email');
  }

  @override
  Widget build(BuildContext context) {
    return Scaffold(
      appBar: AppBar(
        title: Text('Login'),
      ),
      body: Padding(
        padding: EdgeInsets.all(16),
        child: Column(
          mainAxisAlignment: MainAxisAlignment.center,
          children: [
            TextField(
              controller: _emailController,
              decoration: InputDecoration(
                labelText: 'Email',
                border: OutlineInputBorder(),
              ),
            ),
            SizedBox(height: 16),
            TextField(
              controller: _passwordController,
              obscureText: true,
              decoration: InputDecoration(
                labelText: 'Password',
                border: OutlineInputBorder(),
              ),
            ),
            SizedBox(height: 16),
            ElevatedButton(
              onPressed: _handleLogin,
              child: Text('Login'),
            ),
          ],
        ),
      ),
    );
  }
}
I quickly copied the code and ran it in the emulator, and to my delight, the login page was ready within just 2 minutes! Now, it’s time to dive into the customization phase, where I can tailor the login page to match the unique style and branding of my Flutter Task Manager app.

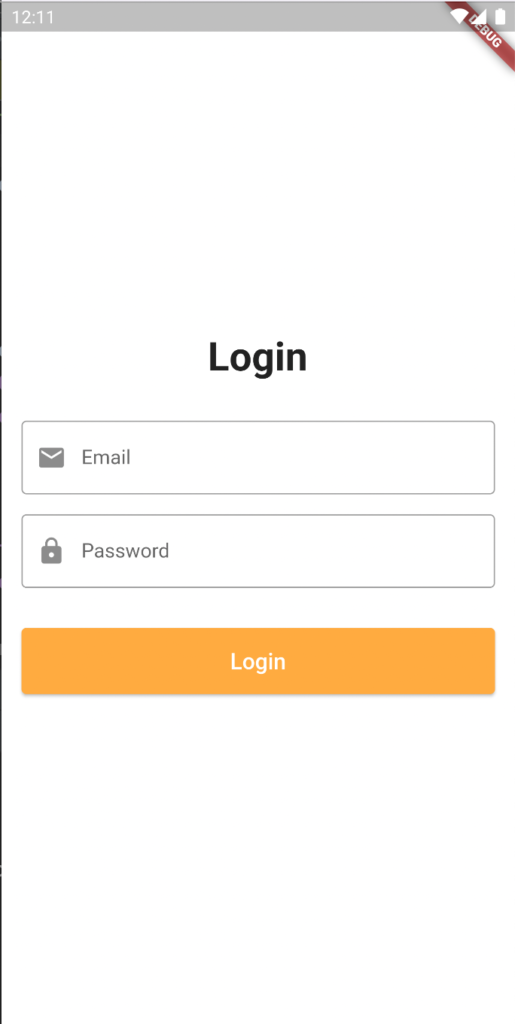
I requested ChatGPT to update the login screen with the following commands, and here’s the result:
- Large login label on top
- Email icon to the left of the email field
- Lock icon to the left of the password field
- Increased size of the login button with a light orange background
- Removed the app bar and aligned all contents in the center

I was amazed by the power of ChatGPT when it promptly presented me with a beautifully crafted login page featuring these design changes
Witnessing the seamless creation of this stunning login page without writing any code was truly eye-opening. The ability of ChatGPT to assist developers, regardless of their expertise, empowers us to bring innovative ideas to life. With the login page now perfected, I’m eagerly looking forward to our next blog post, where we’ll explore ChatGPT’s guidance in designing the registration screen. Stay tuned for more exciting revelations and a fascinating journey of AI-assisted app development!
Happy Fluttering!
